 Configuration - On Premise
- Open the page where you want to have tabbed webparts!
- Edit the page and add SimpleTabs Webpart in same Webpart Zone. (The SimpleTabs webpart can be found in the "SimpleSharePoint" web part group)
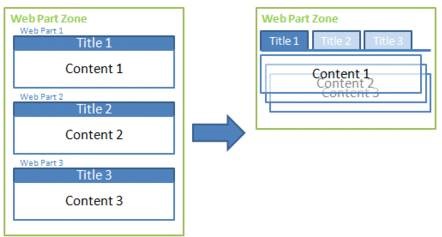
- When added to a Web Part zone, SimpleTabs creates a tab named by Web Part title. Any web parts in that zone (that have a title) will now appear as tabs.
- The SimpleTabs webpart should be the first (top) web part in the web part zone. Please reorder the webparts if necessary to make sure that this is the case.
- Save the page and publish (If enabled).
This section only applies to the On-Prem versions of SharePoint.
Hopefully, SimpleTabs settings are self-explanatory, and can be configured in two ways:
-
Use global settings (this means, the same styles for all web part instances).
-
Per web part settings (for example, from a total of 10 web parts, you want a group with different styles).
Use Global Settings
In your Site Collection, go to Site Settings, under SimpleSharePoint Solutions, click on SimpleTabs Settings link.
Per Web Part Settings
If you want to configure specific styles for one or a group of web parts, under the page where the web part is located, edit the page, edit web part.
Then uncheck
"Use global settings from SimpleTabs Configurator", as shown in the image below.
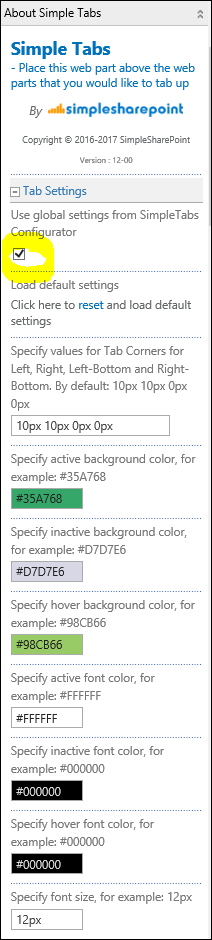
This is very useful to allow setting specific styles for this web part instance.
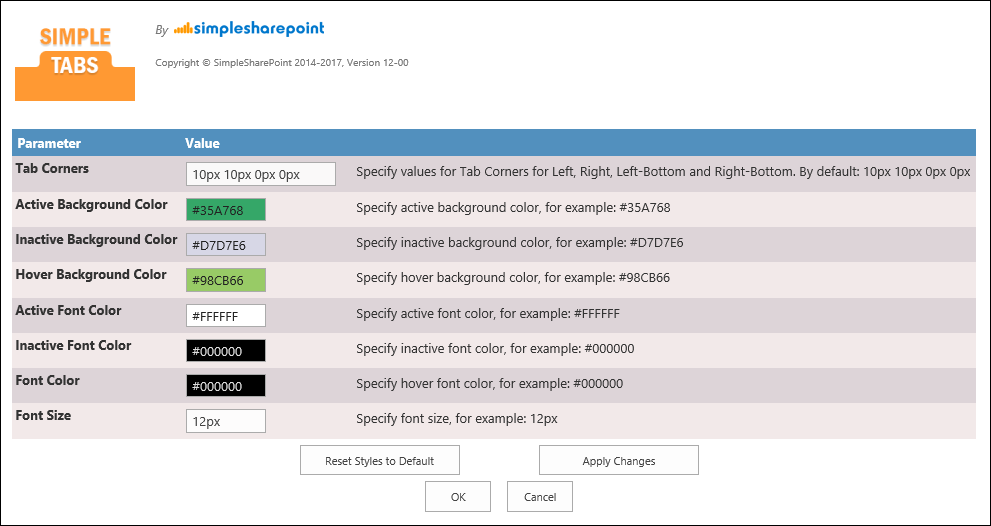
Example of Tabs Corners Configuration
-
CSS Radius for Round Tabs
Use this property to adjust Tabs rounded corners.
The greater the value in pixels, the rounded the corners are.
Example:
3px 3px 0px 0px for Tabs with slightly rounded corners.

Example: 20px 20px 0px 0px, for Tabs with very rounded corners

Custom styling with CSS is useful when you want to make changes that are above and beyond what is available with our Style Configurator.
We suggest applying CSS changes via the following method (unless you already have a custom CSS file that you can add styles to)
- Save the CSS file to a location like /SiteAssets/CustomStyles.css
- Go to Site settings > Masterpage
- Add the URL to the CSS file to Alternate CSS URL (you may also need to check "Reset all subsites to inherit this alternate CSS URL")
Click here to download an example CSS file which will style SimpleTabs as shown below. The CSS file is commented to explain what is being changed. We can also assist with styling if you are trying to match a specific look and feel.